


In the side view, with the snap to curve on, use the EP curve tool to draw a straight horizontal curve that is approximately 6’.
Starting from the end of the 4’ line use the CV curve tool draw a 90
degree curve.
Starting at the end of the curve using the EP curve tool, draw a straight vertical curve that is approximately 8’.
Now draw another 90 degree curve and a straight line approximately 6’.
go to the surface menu> edit curves> attach curves and click on the box
Attach method is connect and keep multiple knots
Select one curve and hold down shift, and select another, attach.
Use the ‘g’ key to repeat command
After all the curves are attached go to edit> delete by type, and delete history
Got to the perspective window with the curve selected center pivot and press the letter ‘f’
In the range slider at the bottom of the screen, change the left 24 to 100 (its highlighted)
You will see the time slider change from 24 to 100, now set the time slider to one
Select snap to line, and move the center pivot to the top end of the curve (hold down d)
With the curve selected, open the channel editor, go to channels > key all, you will see the channel editor change color, and a red mark on the time slider (Maya 2010 might be different)
Move the time slider to 50
Translate the curve to 50 on the x axis
Scale the curve out 3 on the y and 4 down z
Key all
Move the time slider to 100
Translate the curve to 100 on the x axis
Scale the curve to 1.5 on the y and 6 on the z
Key all
Hit play to watch the curve move
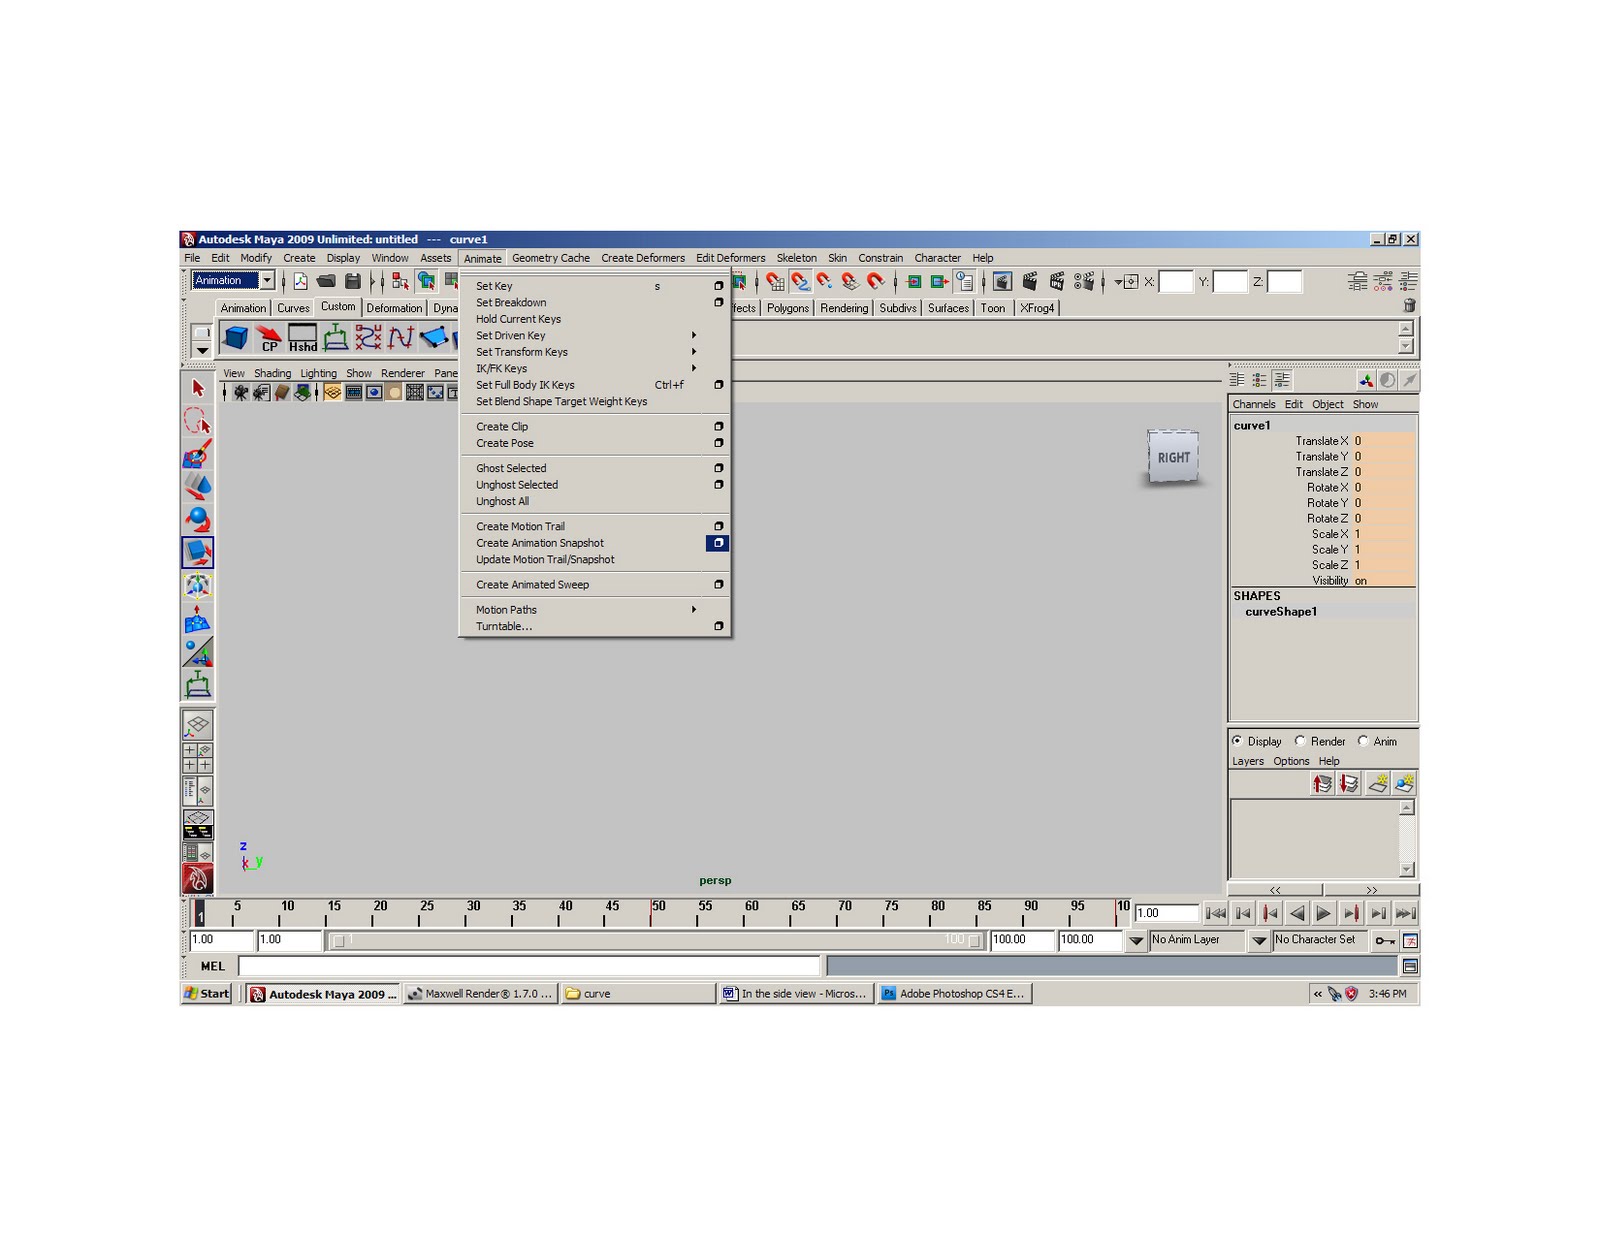
With the curve selected go to the animation menu > animate> create animation snapshot and click on the box
Select “time slider”, increments of 2 (this will give us curves every 2’) and “Fast”
You should see the animation snapshot
Select the original curve and put on new layer called ‘curve’ and turn off the layer
Select the snapshot group on put on layer called snapshot
Select the snap shot group in the options window
In the surface menu, go to edit curve> rebuild curve and click on the box
Rebuild type= uniform
Parameter range= 0 to 1
Keep CV
Keep original
Keeping the rebuilt curves selected translate them on the x 2 feet
Put the rebuilt curves on a layer called “rebuilt”
Now when you select on of the original curves in the snapshot its rebuilt
Product should turn pink
Select one original and its rebuilt
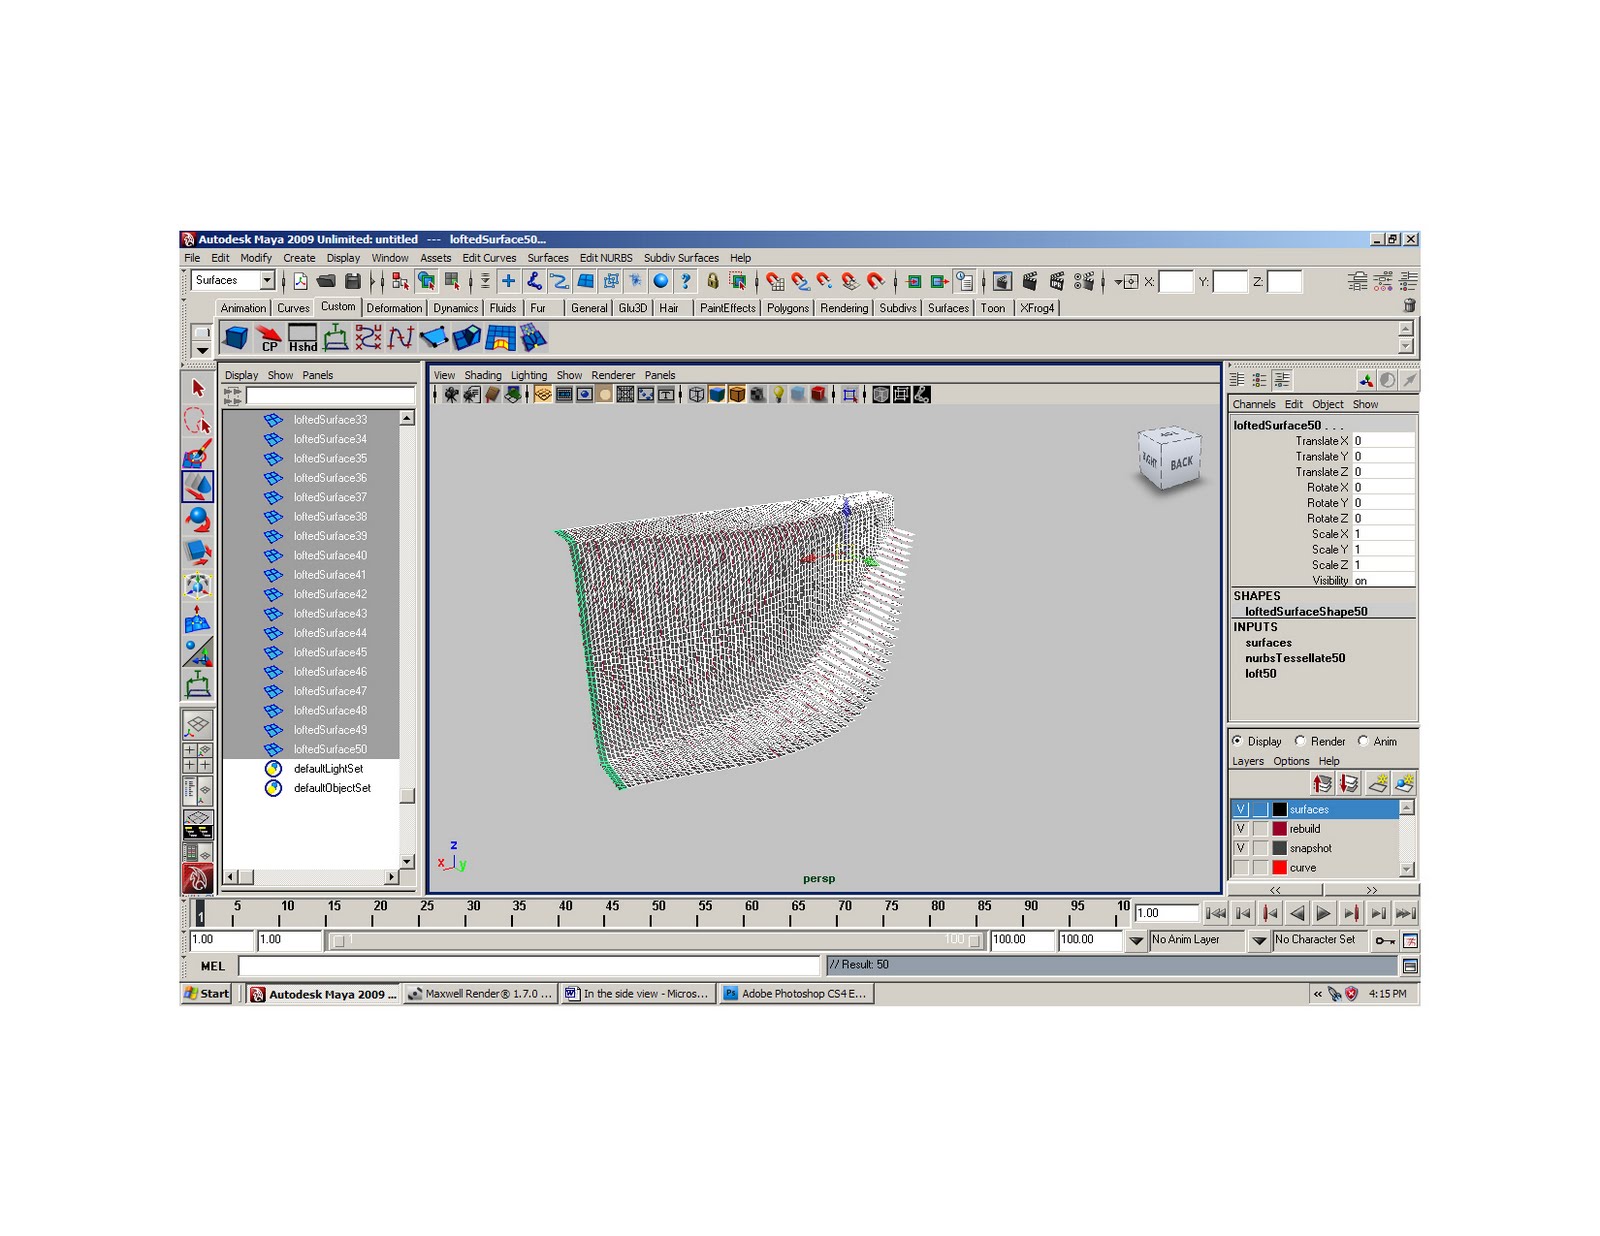
In the surface menu, go to surface>loft and click on box
Output geometry= polygons
Select quads and count
Count = 100
Use g to repeat command
Select the lofted surfaces and put them on a new layer
Go to the polygon menu edit mesh> make sure keep faces together is on
and extrude without an offset. In the channel editor, local translate z = .167 (2”)
With wire frame on shaded selected, select original curve, and see everything turn pink
With the original curve selected, move time slider to 50, and scale y to 4
key all
turn off all layers except for the ‘snapshot’
select the snapshot and in the surface menu got to surfaces> loft
Loft the snapshot curves with a nurbs, (mach slide)
Turn off snap shot layer, and put lofted nurbs surface on a new layer
Select the nurbs surface and in the surface menu, go to edit curves> duplicate surface curves
Put duplicated surface curves on new layer, and turn off lofted surface
Now select the four curves shown and put those on a new layer
Translate the four curves up z 20
Translate the shown curve down to z 3
Turn the nurbs surface back on, and select it. With the right mouse button push, select isoparm
Select the edge of the surface, selecting the isoparm.
With the isoparm selected, in the surface menu, go to edit curve duplicate surface curve
Turn off the nurbs surface layer, and loft the two curve with a polygon
Now select the new curve, and translate z= 2
Turn the surface curve layer on and extrude the new surface local translate z=.167
No comments:
Post a Comment